
You guys, I have a problem. I’m making lists for everything, I’m having dreams about cleaning, and I can’t stop organizing and reorganizing everything in sight. I need an intervention. How I Met Your Mother style 🙂
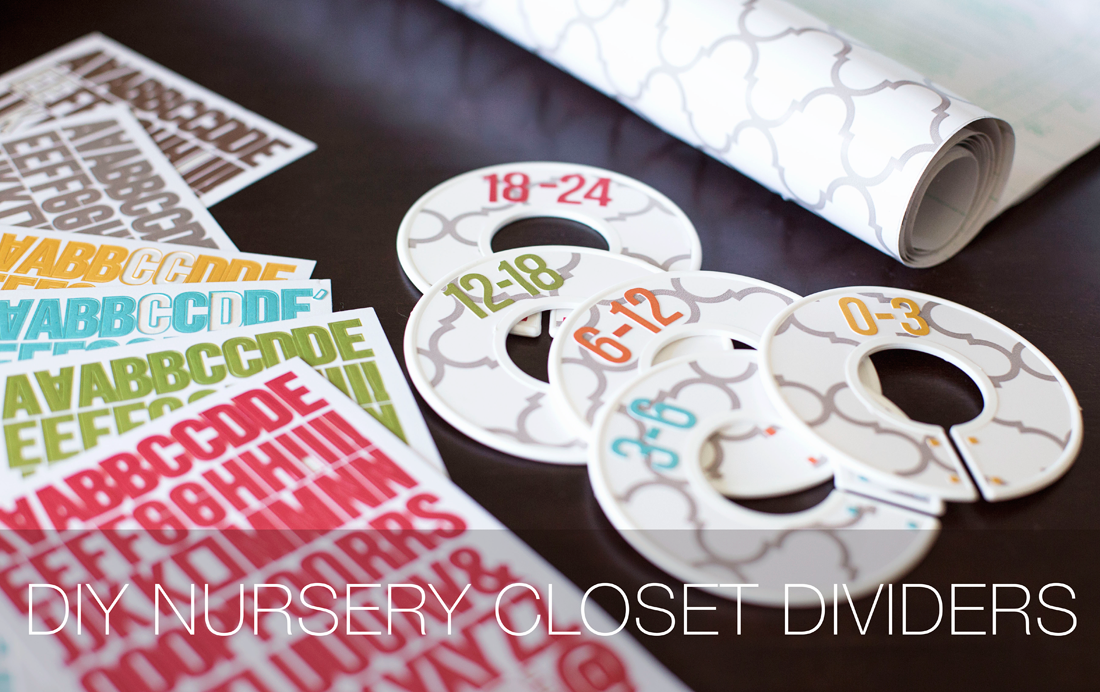
We finally got the baby’s closet put together (so much YAY!) and, for some reason, I was crazy excited to make these closet organizers. Except every DIY I found used a bunch of mod podge & scrapbooking paper. THANKS, but NO THANKS.
So here’s a DIY that doesn’t require printables, glue, wooden door hangers, or scrapbook paper.
What I used:
- Plastic Closet Dividers (I bought mine on amazon, here)
- Contact paper
- Razor Blade or X-ACTO Knife
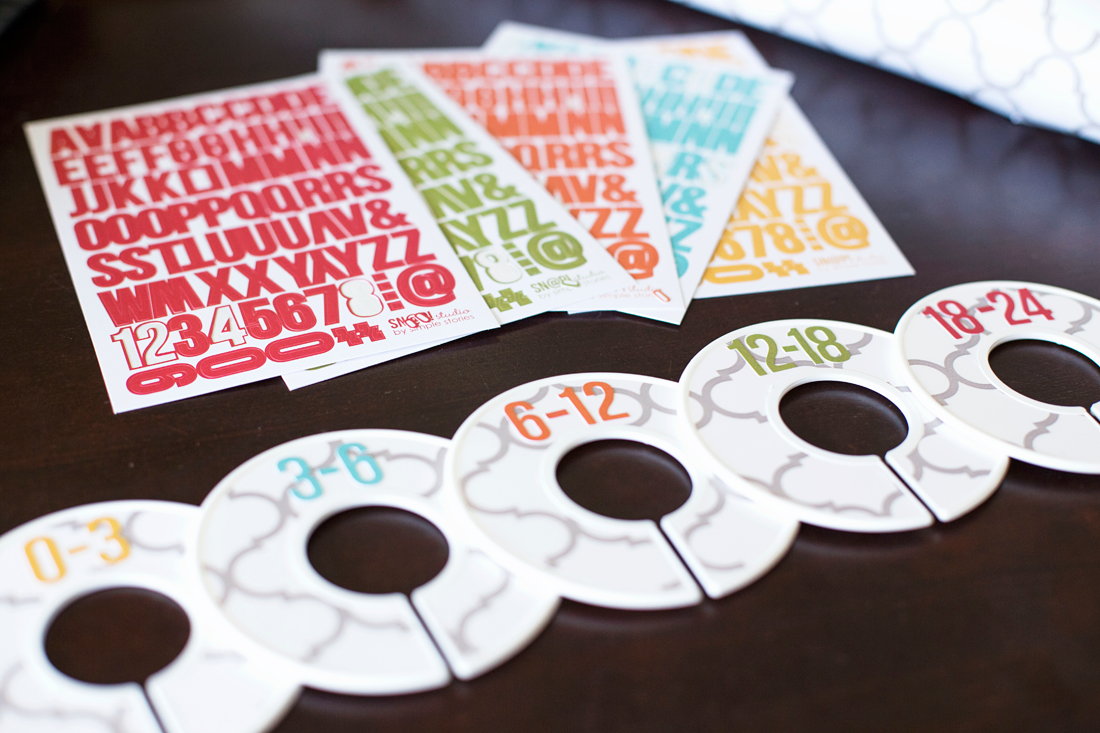
- Letter stickers
You can find cute printed contact paper online or at Walmart, Target or Lowe’s. I bought mine at Lowe’s to line the dresser we painted for the nursery and used the left overs for this little project.
First, peel back just enough of the contact paper and put the plastic divider to the sticky side. Repeat with all of the dividers, then put the back of the contact paper back over the dividers. Flip the contact paper over. Use the razor blade to push the contact paper into the corners and make sure the contact paper is stuck to it.
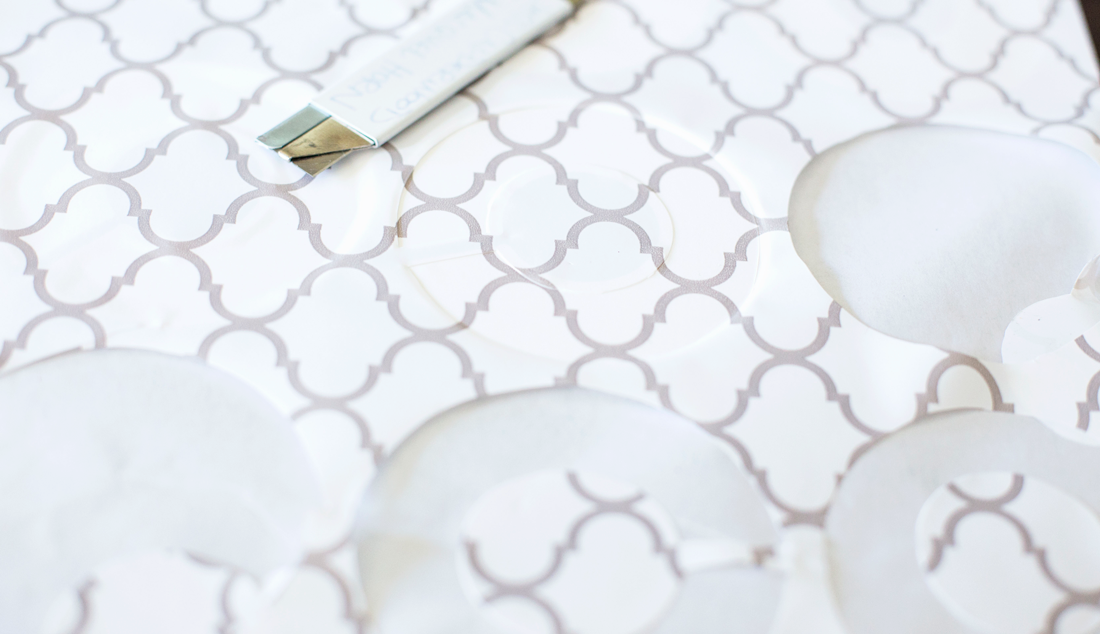
Then follow the edge of the divider with the razor. Once you’ve gone around the entire edge, you’ll be able to peel off the unused contact paper. Like so.
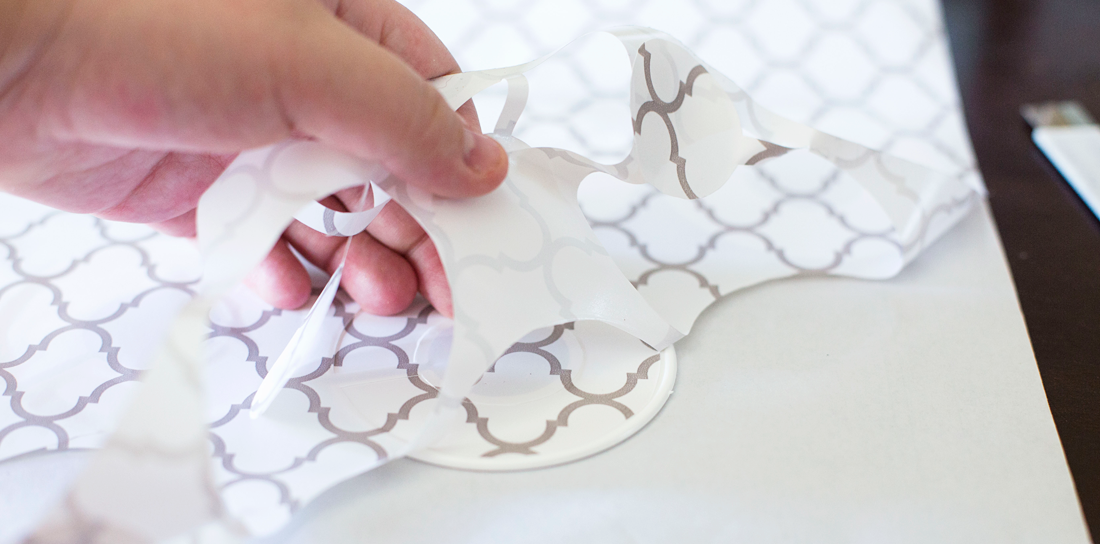
I covered both sides of the dividers & only used about a foot of the contact paper.

Use sticker number or letters to label & you’re done!
I wish I had had more stickers to put numbers on the other side as well, but I was just using stickers I had on hand.
Enjoy!!
